{article.name}

10 Best Tips for Starting Seeds Indoors
Starting seeds indoors can seem intimidating for gardeners who may not have the greenest thumbs, but it's not hard to do with the right preparation and attentive care.
Why Start Your Own Seeds?
When it is possible to buy healthy seedlings from garden centers and nurseries, why should you bother starting seeds indoors? There are many benefits to growing your own plants from seeds, including…
- Cheaper Cost: For just a couple dollars, a packet of seeds may yield a dozen or more plants, making it much cheaper to grow plants from seeds. You can even trade with gardening friends, each of you growing a different seed and swapping when the seedlings are ready for transplanting.
- Greater Variety: Fully grown seedlings are usually only available locally in a few tried-and-true plant varieties, but choosing to grow your own plants from seed allows you to choose from many more types, creating a more diverse garden to meet your individual tastes.
- Longer Growing Season: If you live in a region with a very short growing season, certain plants may not be able to mature fully outdoors before being subject to autumn temperatures or frosts. If you start seeds indoors earlier, you lengthen your effective growing season.
- Chemical Control: If you prefer organically grown plants or have any sensitivity to gardening chemicals, it is best to start your own seeds. That way, you will always know exactly how the plants have been treated and whether or not they have been subjected to chemical treatments.
10 Tips to Make the Most of Your Seeds
No matter what seeds you want to start, certain steps can help your seeds thrive with minimal fuss and frustration.
- Study the Seeds
Different seeds and seedlings have different growing needs. Be sure you understand each plants' requirements and are prepared to meet those needs. Grouping plants with similar needs together will make caring for indoor seedlings easier.
- Plan Seed Timing
Understand how long it takes seeds to germinate and for seedlings to reach an appropriate size for transplanting, and start the seeds at the right date so it is safe to transplant them when they are ready to be outdoors. You can even stagger seed starts to create a longer harvest to enjoy.
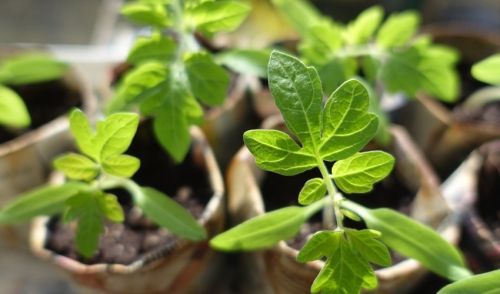
- Try Biodegradable Containers
The fragile root hairs of seedlings are critical for plants to take up water and nutrients, and transplanting can be stressful on delicate plants. Instead of needing to remove the plants from plastic pots, opt for newspaper cups, eggshells, paper egg cartons or other plantable containers so the seedlings do not need to be disrupted at all.
- Label Pots
Many seedlings look alike when they are very young, and it can be confusing to transplant seedlings if you have forgotten which pot is which. Labeling the pots carefully will allow you to transplant seedlings more effectively, choosing the best garden spot for each plant.
- Plant More Than Needed
Not all seeds from the same packet are likely to germinate, and not all seedlings will be equally robust and healthy. By planting more seeds than you will need, you can take your pick of the strongest plants when it is time to transfer them to the garden. You'll also be able to share extra plants with family members, friends and neighbors.
- Use Quality Dirt
Seeds need spongy, moist soil in order to germinate. Do not simply fill pots with soil from the garden, as it will likely contain insects and weeds that can stunt seedling growth. Instead, choose a seedling potting mix with good drainage and rich nutrition to nurture seeds and young plants.
- Provide Heat
Seeds need consistent warmth – about 70 degrees – to germinate well. Heat lamps or specialized planter heating pads can provide that warmth, or seed trays can be positioned near a heating vent or in a warm spot to keep them at a comfortable temperature. Once the young shoots emerge, however, the supplemental heat will not be needed.
- Provide Water
Seeds and seedlings need suitable moisture. The soil should be moist but not waterlogged, since seeds will drown without oxygen. Covering a seed tray with plastic wrap can use natural humidity to keep the soil damp until germination, and young seedlings can placed on a drip tray to take up water through the soil. Daily misting is also helpful to keep the soil moist.
- Provide Light
Once seeds have germinated, they need appropriate light to grow strong and healthy. If the light source is too far away, plants will grow too tall too quickly, developing a leggy stature with thin, weak stems. Seedlings need 12-16 hours of sunlight each day, and supplemental bulbs are often necessary for starting seeds. Suspend bulbs a few inches above the plants for the best results, raising the lights as the seedlings grow.
- Offer Tough Love
To help seedlings grow even stronger, gently ruffle the stems a few times a day or have a fan gently blowing nearby to provide active air currents. A week or two before transplanting the seedlings outdoors, put them outside for gradually longer periods starting at just an hour and working up to leaving them outdoors almost all day. This will help the seedlings harden off and better resist the trauma of transplanting.
Starting your own seeds may seem complicated, but with a little planning and care, every gardener can enjoy the challenges and rewards of raising their own plants from seeds.
Comments